Nano Reef Cycling Guide for New Aquarists
Starting a nano reef aquarium can feel like embarking on a thrilling adventure, full of both excitement and a few butterflies in your stomach. Picture this: you’ve just set up your tank, and as you gaze into the clear water, you can already imagine the vibrant fish and colorful corals dancing in the waves.
But first, there’s an essential task at hand — cycling your tank.
Cycling is all about creating a healthy environment for your aquatic friends. Think of it as preparing a cozy home before inviting guests over. During this process, beneficial bacteria will start to flourish, working hard to transform harmful waste into less toxic forms — like turning the leftovers from a dinner party into compost for your garden.
It might take a few weeks, and there’ll be moments when you check your water parameters with a mix of hope and anxiety, wondering if everything is going as planned.
But don’t worry! Just like learning to ride a bike, you’ll find your balance. As you keep an eye on your water chemistry, you’ll gain confidence and knowledge, ensuring your underwater world not only survives but thrives.
So, are you ready to dive into the steps and make that dream aquarium a reality?
Key Takeaways
- Start by setting up your aquarium with live rock and substrate to create a habitat for beneficial bacteria.
- Cycle the tank by introducing ammonia sources, such as fish waste or rotting food, to establish bacterial growth.
- Monitor ammonia, nitrite, and nitrate levels regularly using test kits to ensure a safe environment for your marine life.
- Perform regular water changes to manage nitrate levels and maintain water quality during the cycling process.
- Wait for the cycle to complete (typically several weeks) before adding fish or corals to prevent harmful spikes in toxins.
Understanding the Nitrogen Cycle
When you immerse yourself in the world of nano reefs, understanding the nitrogen cycle is super important, because it helps keep your little underwater ecosystem healthy. The nitrogen cycle involves several steps, starting with ammonia, which comes from fish waste and rotting food. Don’t worry, though! Helpful bacteria convert ammonia into nitrite, which is still toxic but less so. Then, another set of bacteria steps in to change nitrite into nitrate, something your plants can actually use. Finally, regular water changes help keep nitrate levels in check. By grasping this cycle, you’ll create a balanced environment for your fish and corals. So, immerse yourself and watch your reef thrive while you learn about this essential process!
Setting Up Your Nano Reef Aquarium
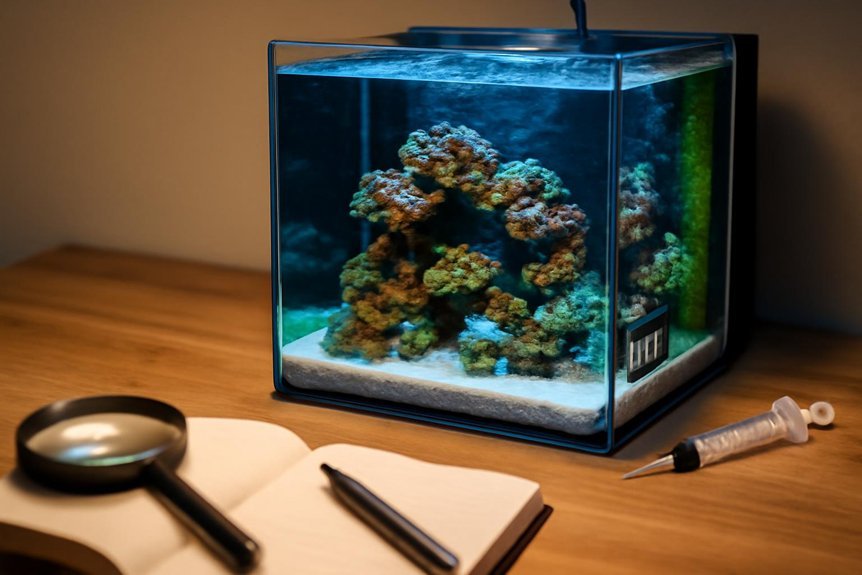
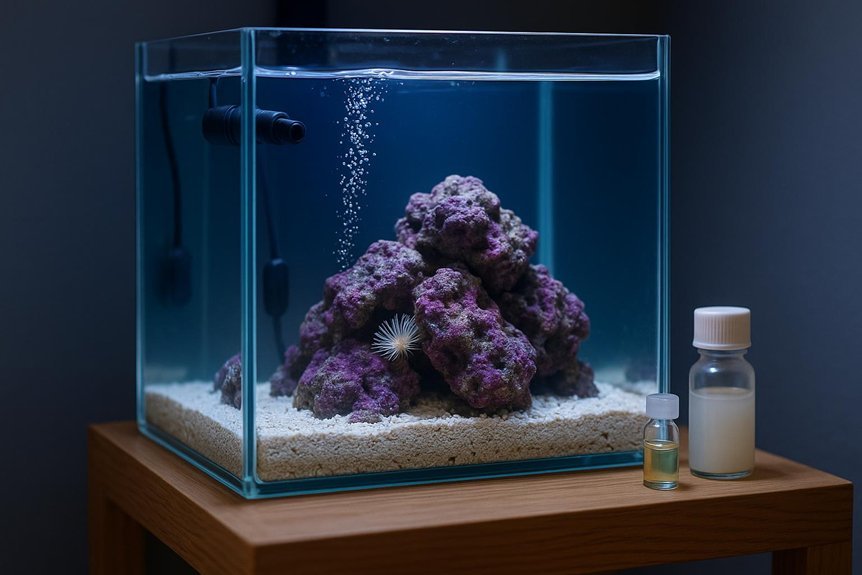
Setting up your nano reef aquarium can feel like starting a mini ocean adventure, and you’ll want to get it just right! First, pick a suitable tank size—typically between 5 to 20 gallons is ideal. Make sure you place it on a sturdy surface that can handle the weight. Next, rinse your tank with fresh water, avoiding soaps or chemicals. Add live rock and substrate, creating a natural environment for your aquatic friends. After that, fill your tank with dechlorinated water. It’s also important to leave some space for your future fish and corals. Finally, cycle your tank to establish beneficial bacteria. Remember, patience is key; good things come to those who wait! Your underwater paradise awaits!
Choosing the Right Equipment

Choosing the right equipment for your nano reef aquarium can make all the difference in creating a thriving underwater world. Start with a reliable filtration system; it’s essential for keeping your water clean and clear. You’ll also need a good heater, as stable temperatures are vital for your aquatic friends. Don’t forget about lighting! Coral and other marine life thrive under the right spectrum of light, so invest in quality LED lights. A water pump is another must-have, helping with circulation and ensuring all your critters get enough oxygen. Finally, consider a protein skimmer if you want to keep the water extra clean. With the right gear, you’re well on your way to a vibrant and happy nano reef!
Selecting Live Rock and Substrate
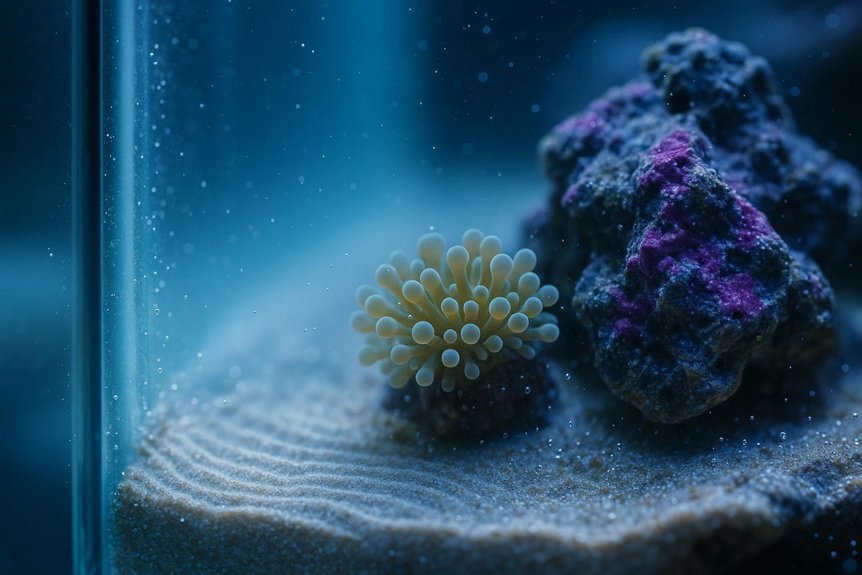
With your equipment in place, it’s time to think about what goes inside your nano reef. First up is live rock. You’ll want to choose pieces that are porous and varied in shape, as this helps create hiding spots for your future fish and corals. Plus, it adds a natural touch to your tank! When it comes to substrate, opt for coarse sand or small gravel; both allow for good water flow and prevent harmful debris from settling. Make sure to rinse everything thoroughly to avoid any unwanted surprises. Remember, the right live rock and substrate not only enhance your tank’s appearance but also provide a healthy environment, setting the stage for your underwater adventure. Happy aquascaping!
Introducing Beneficial Bacteria
Before you plunge into adding fish and corals, it’s important to introduce beneficial bacteria to your nano reef. These tiny helpers are vital for breaking down waste and keeping your tank’s ecosystem healthy. You can add them by using products specifically designed for this purpose, like bottled bacteria or live rock with existing bacteria. Just follow the instructions on the bottle, and you’ll be good to go! Once introduced, these bacteria will establish themselves in your substrate and filter, creating a natural balance. This process might take a few weeks, so be patient—great things take time! Remember, a thriving reef starts with a solid foundation of beneficial bacteria, setting you up for success down the line.
Testing Water Parameters
Testing water parameters is like checking the pulse of your nano reef; it helps you guarantee everything’s running smoothly. You’ll want to use a reliable test kit to measure key factors like pH, salinity, and temperature. These parameters impact your little underwater world, so keeping an eye on them is essential. Don’t just guess—getting accurate readings saves you from potential disasters later. You can think of it as a health check-up for your reef; regular testing helps spot issues early. Just remember, the happier your water is, the happier your fish and corals will be! So, grab your test kit and start monitoring; your reef will thank you for it, even if it can’t say so in words!
Monitoring Ammonia, Nitrite, and Nitrate Levels
Now that you’ve got a handle on testing your water parameters, it’s time to focus on monitoring ammonia, nitrite, and nitrate levels. These chemicals are essential players in your nano reef’s health. Ammonia should always be at zero; if it spikes, it can harm your fish. Nitrite is another culprit that can be dangerous, and like ammonia, you want that at zero too. Nitrate, on the other hand, is less harmful but should still be kept low to prevent algae blooms. Regularly check these levels using test kits, and make a note of any changes. If you see a rise, act fast! Remember, keeping these levels in check is vital for creating a thriving underwater world. Happy monitoring!
Adding Inhabitants Gradually
As you immerse yourself in the exciting world of nano reef aquariums, it’s important to remember that patience is key when adding inhabitants. You shouldn’t rush this process! Start with a few hardy species that can help establish your ecosystem. Think of them as the brave pioneers of your underwater world. After a couple of weeks, check your water parameters to verify everything’s stable. If they’re looking good, you can introduce more inhabitants gradually. This way, your tank can adjust to the new additions without stress. Just like a party, you don’t want to invite everyone at once—let your fish and corals settle in and get to know each other. Happy reefing!
Maintaining Stable Conditions
Once you’ve added your first few inhabitants and they’re settling in, it’s time to focus on maintaining stable conditions in your nano reef. Keeping your water parameters steady is essential for happy fish and corals. Check your temperature regularly, aiming for 76-82°F, and make adjustments if needed. Monitor the salinity, too; it should be around 1.023 to 1.025 specific gravity.
Don’t forget about pH! Keep it between 8.1 and 8.4 to avoid stressing your aquatic friends. Regular water changes help maintain clarity and nutrient balance, so aim for 10-20% every week. Finally, keep an eye out for any unusual changes in your tank; early detection is key! With a little care, your nano reef can thrive beautifully.
Troubleshooting Common Cycling Issues
When you’re cycling your nano reef, you might run into a few bumps along the way, but don’t worry—troubleshooting these common issues is easier than it sounds! If your ammonia levels spike, it could mean your beneficial bacteria aren’t established yet. Adding a small shrimp can help kickstart their growth. If you notice cloudy water, that’s likely a bacterial bloom, which is normal. Just wait it out; it’ll clear up soon! And if your nitrite levels are stubbornly high, be patient; your cycle just needs a little more time. Remember, cycling is a process, not a race. Keep testing your water regularly, and soon you’ll have a thriving nano reef that’s ready for fish and corals!
FAQ
How Long Does the Cycling Process Typically Take for a Nano Reef?
1. How long does the cycling process for a nano reef take?
The cycling process for a nano reef typically takes about four to six weeks.
2. What key parameters should I monitor during the cycling process?
You should monitor ammonia, nitrite, and nitrate levels to ensure proper establishment of your aquarium’s ecosystem.
3. Why is cycling important for a nano reef?
Cycling is crucial as it allows beneficial bacteria to develop, which helps break down toxins and supports a healthy environment for your future livestock.
4. Can I add livestock to my nano reef during the cycling process?
No, it is advisable to wait until the cycling process is complete and your water parameters are stable before introducing any livestock.
5. What happens if I add livestock too early?
Adding livestock too early can lead to toxic conditions, causing stress or death to the animals due to elevated ammonia and nitrite levels.
6. How can I tell when my nano reef is fully cycled?
Your nano reef is considered fully cycled when ammonia and nitrite levels drop to zero, and you see the presence of nitrates.
7. Are there any signs that indicate my nano reef is cycling?
During cycling, you may notice fluctuations in ammonia and nitrite levels, followed by a rise in nitrate levels as the process progresses.
8. What can I do to help speed up the cycling process?
You can add live rock or live sand, which contain beneficial bacteria, to help establish the biological filtration more quickly.
9. Is it normal to experience fluctuations in water parameters during cycling?
Yes, fluctuations in ammonia, nitrite, and nitrate levels are normal during the cycling process as the beneficial bacteria colonize.
10. How often should I test my water during the cycling period?
It is recommended to test your water at least once a week during the cycling period to track the changes in ammonia, nitrite, and nitrate levels.
Can I Add Fish During the Cycling Process?
FAQs about Adding Fish During the Cycling Process
1. Can I add fish while my aquarium is cycling?
No, it’s not recommended to add fish during the cycling process as it can cause them unnecessary stress.
2. What happens to fish if added during cycling?
Adding fish can lead to poor water quality and harm their health due to the unstable environment.
3. How long does the cycling process take?
Cycling typically takes 4 to 6 weeks, depending on various factors like temperature and the method used.
4. What is cycling in an aquarium?
Cycling refers to establishing beneficial bacteria in the tank that convert harmful ammonia from fish waste into less toxic substances.
5. What symptoms indicate fish are stressed during cycling?
Stressed fish may exhibit signs like erratic swimming, hiding, or loss of appetite, which can be detrimental to their health.
6. Is it better to wait until after cycling to add fish?
Yes, waiting until after the cycle completes ensures a stable and healthier environment for your fish.
7. Can I add beneficial bacteria to speed up cycling?
Yes, adding commercial beneficial bacteria can help speed up the cycling process and create a healthier tank.
8. What are the risks of adding fish before the cycle is complete?
The risks include toxic ammonia build-up, which can cause severe health issues or even death for the fish.
9. Are there any exceptions to adding fish during cycling?
While some people use the “fish-in” cycling method, it’s generally not advisable due to the stress and risk it poses to the fish.
10. How can I tell when my aquarium is fully cycled?
Your aquarium is fully cycled when you can consistently test for zero ammonia and nitrite levels, along with stable nitrate levels.
What Should I Do if I Notice Algae Growth?
FAQs on Managing Algae Growth
1. What should I do first if I see algae in my aquarium?
Begin by reducing the amount of lighting your aquarium receives. Algae thrive in bright conditions, so dimming the lights can help slow their growth.
2. How can I improve water flow to combat algae?
Increasing water flow can help disrupt algae growth by preventing stagnation. You can achieve this by adjusting your filter or adding a water pump.
3. Is manual removal of algae effective?
Yes, manually scrubbing or scraping off algae from surfaces can significantly reduce its presence. Be sure to use appropriate tools to avoid damaging your aquarium decor.
4. How often should I change the water to manage algae?
Regular water changes, ideally every 1-2 weeks, can help maintain water quality and reduce nutrients that fuel algae growth. This practice is essential for a healthy aquarium.
5. What role does filtration play in controlling algae?
Good filtration helps remove excess nutrients and debris that encourage algae growth. Ensure your filter is functioning properly and is appropriate for your aquarium size.
6. Can reducing fish feeding help with algae control?
Yes, overfeeding fish can lead to excess waste and nutrients in the water, promoting algae growth. Feed only what your fish can consume in a few minutes to prevent this.
7. Should I consider adding live plants to my aquarium?
Live plants can compete with algae for nutrients and help reduce its growth. They also enhance the aesthetic of your aquarium and provide habitat for fish.
8. Are there specific treatments for stubborn algae?
If algae persists, consider using an algae-specific treatment or chemical solutions available at pet stores. Always follow the instructions carefully to avoid harming your fish.
9. How can I prevent algae from returning after removal?
To prevent algae from returning, maintain consistent water quality, monitor nutrient levels, and regularly clean your aquarium. Establishing a routine will help keep algae at bay.
10. Is it normal for some algae to appear in my aquarium?
Yes, some algae growth is normal in aquariums and can even be beneficial. However, if it becomes excessive, take action to manage it as needed.
11. What are the signs of excessive algae growth?
Signs include a greenish tint to the water, visible patches on surfaces, or decreased visibility. If you notice these symptoms, it’s time to take steps to control the algae.
How Often Should I Test My Water During Cycling?
1. How often should I test my water during cycling?
You should test your water at least two to three times a week. This frequency allows you to keep track of the cycling process effectively.
2. What parameters should I monitor while cycling?
Focus on ammonia, nitrite, and nitrate levels. These parameters are crucial for ensuring a balanced and healthy aquatic environment.
3. Why is testing ammonia important?
Ammonia is toxic to fish, and high levels can hinder the cycling process. Regular testing helps you identify and address any spikes in ammonia.
4. What does high nitrite indicate?
High nitrite levels can also be harmful to fish and are a sign that the cycling process is not yet complete. Monitoring nitrite helps you assess the effectiveness of your biological filtration.
5. How does nitrate affect my aquarium?
Nitrate is less toxic than ammonia and nitrite but can still affect fish health at elevated levels. Keeping an eye on nitrate helps you prepare for water changes.
6. What should I do if I detect high ammonia or nitrite levels?
If you find high levels of ammonia or nitrite, perform partial water changes to dilute the concentrations. Additionally, ensure your filter is functioning properly.
7. Can I test my water too often?
While frequent testing is beneficial, testing more than necessary can be redundant. Stick to two to three times a week to monitor your cycling progress effectively.
8. What testing kits are recommended for cycling?
Use reliable liquid test kits or digital testers that measure ammonia, nitrite, and nitrate. These tools provide accurate results essential for your cycling process.
9. How long does the cycling process usually take?
Cycling typically takes 4 to 6 weeks, depending on various factors such as temperature and the presence of beneficial bacteria. Regular testing will help you determine when your cycle is complete.
10. When can I introduce fish after cycling?
You can introduce fish once ammonia and nitrite levels are consistently at zero, and nitrate levels are manageable. Always acclimate new fish properly to minimize stress.
Is It Necessary to Use a Protein Skimmer During Cycling?
FAQ 1: Is a protein skimmer needed during the cycling process?
No, a protein skimmer is not necessary during cycling. The primary goal during this phase is to establish beneficial bacteria.
FAQ 2: What is the main purpose of cycling a tank?
Cycling a tank is essential for developing beneficial bacteria that will help break down waste products. This process prepares the tank for future inhabitants.
FAQ 3: When should I add a protein skimmer to my tank?
You should add a protein skimmer after the cycling process is complete. This addition will help maintain water quality in your nano reef.
FAQ 4: How does cycling affect water quality?
Cycling improves water quality by converting toxic ammonia and nitrite into less harmful nitrate through beneficial bacteria. This stage is crucial for creating a stable environment for aquatic life.
FAQ 5: Can a protein skimmer interfere with the cycling process?
Yes, a protein skimmer can potentially remove beneficial bacteria from the water. It’s best to let the cycling process run its course without adding a skimmer.
FAQ 6: What happens if I use a skimmer during cycling?
Using a skimmer during cycling could hinder the growth of necessary bacteria. This may prolong the cycling process and delay the establishment of a stable environment.
FAQ 7: How long does the cycling process usually take?
The cycling process typically takes anywhere from 4 to 6 weeks, depending on various factors like the tank’s size and water parameters. Patience is key during this time.
FAQ 8: What are the signs that my tank has completed cycling?
You can tell your tank has completed cycling when ammonia and nitrite levels drop to zero, and nitrate levels may rise. Testing your water regularly is important to monitor these changes.
FAQ 9: Should I perform water changes during cycling?
It’s generally advised to avoid water changes during cycling, as they can disrupt the process. Allowing the cycle to complete naturally supports the establishment of beneficial bacteria.
FAQ 10: What role does a protein skimmer play after cycling?
After cycling, a protein skimmer helps to remove organic waste and proteins from the water, improving overall water quality. This is particularly beneficial for maintaining a healthy nano reef environment.
Final Thoughts
Cycling your nano reef aquarium might take a bit of time, but it’s totally worth it! By patiently following each step, you’re setting up a vibrant home for your fish and corals. Remember to keep testing your water and introduce your creatures slowly. Once your tank is fully cycled, you’ll see it thrive, and that’s going to be super rewarding. So, grab your test kit and get ready for a colorful underwater adventure!